
Tools and Materials
Tools
- Drill/Driver & Bits
- Circular Saw & Blade
- Brad Nailer
- Air Compressor & Hose
- Tape Measure
- Stud Finder
- Level
- Sanding Block or Sanding Sponge
- Chalk Reel
- Bar Clamps
- Paint Brushes
- Saw Horses
- Speed/Rafter Square
- Drop Cloths
- Cabinet Hardware Mounting Kit
- Safety Glasses
- Respirator
- Hearing Protection
- Oscillating Tool (Optional)
- Hole Saw (Optional)
- Saw Guide (Optional)
- Prybar (Optional)
Product costs, availability and item numbers may vary online or by market.
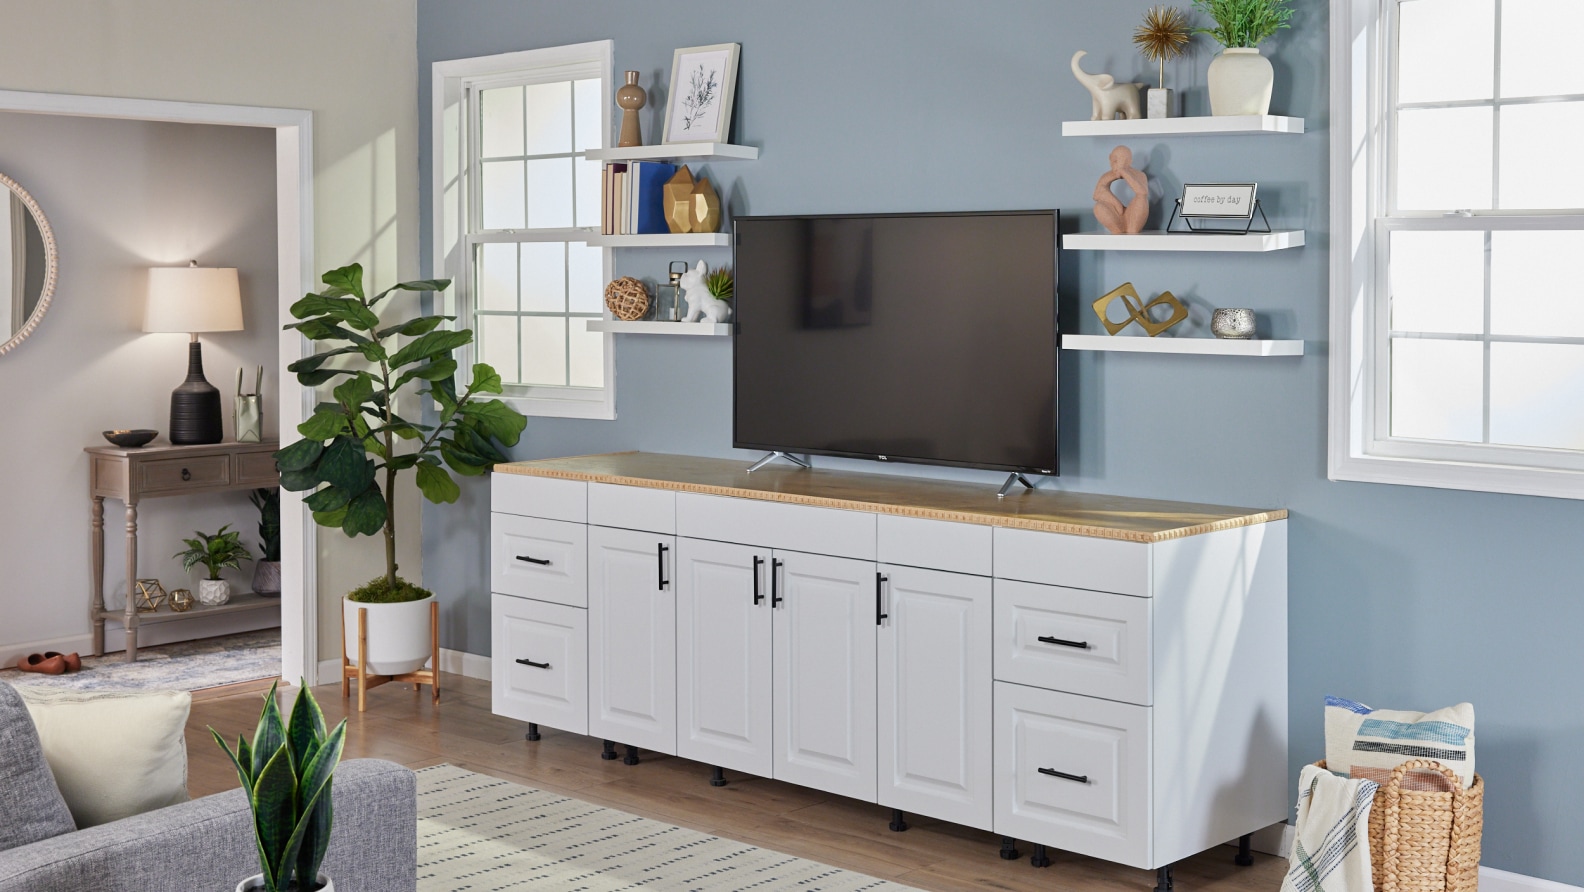
Key Parts of the DIY Entertainment Center


The two main parts of our do-it-yourself entertainment center are the base and the top.
- The Base: We’re using prefinished, ready-to-assemble (RTA) kitchen base cabinets for the base. You can also use fully assembled cabinets for an easier project. If you want to stain or paint the cabinets to fit your room, choose unfinished cabinets.
- The Top: We’re using sanded veneer-faced 3/4-inch plywood for the top of the entertainment center base.
We’re also installing floating shelves to create some extra display and storage space.


DIY Entertainment Center Prep Work
Once you’ve decided on your design and configuration, there are a few things you need to do before you begin building.
Size Your DIY Entertainment Center

Measure the width of your TV to plan the size of the unit and add in the display or storage space you want to include with your media center. And, of course, measure your available space. These measurements will help you choose cabinets that will form the base of the media center. We’re using a sink base cabinet with a drawer base cabinet on each end.
Get the Installation Area and Cabinets Ready

You’ll need to secure the cabinets to the wall, so there’s some prep work to do at the installation area.
- Dry fit the cabinets in the installation area and locate wall studs. Mark stud locations for the base cabinets and the floating shelves.
- Depending on the cabinets you choose, you may need to remove the baseboard moulding to create a flush fit. Using the measurements of your media center, carefully cut and remove the moulding from the wall. Patch, repair and paint the area, if necessary.
And, of course, if you’re using RTA cabinets, you’ll need to put them together according to the manufacturer’s instructions.
Building the Custom Entertainment Cabinet
The main parts of the project are building the base for your entertainment center, installing the top and installing the shelves.
Instructions


Install the Shelves

Install the shelves on the wall above the entertainment center. Secure them to the wall studs you marked earlier. Follow the shelf manufacturer’s instructions for installation and check for level and proper placement as you go. For our project, we set the bottom shelf 16 inches above the base and spaced the shelves 10 inches apart.
Customize a Do-It-Yourself Entertainment Center
Building a DIY entertainment center opens up several opportunities for customization. Here are some quick ideas. Mix and match them to create a piece that’s perfect for your home.
DIY Entertainment Center Base Options
Using different types of cabinets makes a big impact on the final look of your media center.
- If you just need a small entertainment center, you can use a single preassembled sink cabinet for a simpler, one-piece base.
- Wall cabinets aren’t as deep as base cabinets and give your entertainment center a lower profile. However, you’ll need to build bases for the cabinets.
DIY Entertainment Center Top Options

There are several options for the top of your media center that create a more designed look. For example:
- A butcher’s block countertop gives the entertainment center a unique, sturdy top with lots of natural warmth and texture.
- Laminate countertops give you even more options for the look of your entertainment center. Be sure to choose one without a backsplash.
If you opt for a kitchen countertop, take a look at our how-to guides, How to Install a Butcher Block Countertop or How to Install Laminate Countertops, for details on sizing and installation.
DIY Entertainment Center Shelving System Options
Using wall shelving for storage and display simplifies the project, but if you want to take on some woodworking, you can build shelves to create any look and fit any organizational need. Here are a couple of options to get you started:
- Center the TV between two shelves for a balanced, traditional look.
- Hang the TV on the wall with a wall mount set between or to one side of the shelves to give your entertainment center a clean, modern look.
If you’re adding shelving to the base, be sure to size your unit to provide two inches of clearance on each side of your TV for ventilation.