
Tools and Materials
Tools
Product costs, availability and item numbers may vary online or by market.
Gather Your Window Cleaning Supplies


Cleaning your windows twice a year is an uncomplicated way to keep your home looking its best, but window cleaning is an often-overlooked task. Learn how to make your own window cleaning solution and how to wash windows for a streak-free view and maximum natural light in your home.
There are many glass cleaners that'll get your windows clean and streak free, so you can choose the one that works best for your home. You can also easily make your own solution for cleaning windows with vinegar and other household items. Combine equal parts vinegar and rubbing alcohol, and add a couple drops of dishwashing liquid. No rubbing alcohol? Mix equal parts vinegar and hot water, and you have an all-natural cleaner that works great. Pour the cleaner into a spray bottle and you're ready to go.
Once you have window washing fluid, think about your window cleaning tools. You can clean the windows with any kind of towel or cleaning cloth, but to get the windows looking their best, try a window cleaning tool such as a squeegee and scrubber combo. The scrubber removes dirt and grime, and the squeegee helps prevent streaking. If you're cleaning higher windows, look for one that includes a telescoping or screw-on extension arm or a separate extension handle.
Follow the instructions and safety precautions for any cleaning product you use. Wear appropriate safety gear such as safety glasses and cleaning gloves.
Washing the Windows

A twice-yearly window cleaning will keep your home looking its best. The simple steps below will help make them sparkle like new.
If you notice pinesap or other gunk on the window exteriors, use rubbing alcohol, a window scraper or a plastic putty knife to remove the residue before you begin washing the windows.
Inspect Your Windows

Give your windows a visual inspection before cleaning. Do you see any chipped or blistering paint? For wooden windows that may be a sign of rotting wood. For vinyl or aluminum windows, look for missing weatherstripping or caulking to avoid having any water leaks inside your home. If everything looks sound, use a brush or broom to remove cobwebs, dust, and loose dirt.
If you're using a ladder, make sure all the feet are firmly placed on the ground and follow the manufacturer's instructions.
Cleaning the Windows

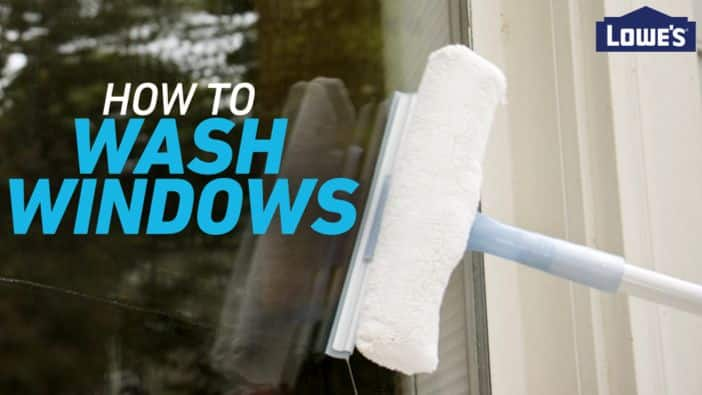
Spray your cleaner on the window starting at the top and scrub with one side of your tool working from the top to the bottom. Use the squeegee side, moving in an S pattern to remove the cleaner. A microfiber cleaning cloth works well to clean the edges of the window and catch any drips. If you're working inside, consider placing a towel or plastic drop cloth along the bottom sill to keep any cleaning solution from dripping onto the floor.
Cleaning the Window Screens

Don't forget about cleaning window screens. You can clean your window screens with water, dish soap and a soft-bristle brush.
If your screens are damaged or if you want to upgrade them with screens that help reduce heat, increase privacy or resist pet damage, our step-by-step guide to replacing window screens will show you how to do it.
Cleaning Window Sills, Frames and Casings

As a part of your window cleaning project, don't forget the window sills, frames and casings.
These components get dirty and dusty, and excess moisture may have allowed mold growth. Wear goggles — nonvented goggles are best if you're dealing with mold — cleaning gloves with extended cuffs and a safety mask/respirator.
Make sure any commercial cleaner you use is labeled for the surface you're cleaning. It's a good idea to test any cleaning solution on an inconspicuous area before using it to clean a larger area.
Check for Any Mold
If you notice mold on the windowsill or frame, you should deal with it first. Cover the wall and floor under the window with a plastic drop cloth. You can clean nonporous surfaces with cleaning products, mild dish detergent and water or a solution of water and bleach according to the bleach label instructions. To reduce the chance of disturbing the mold spores, first, dampen the area with your cleaning solution. Make sure the room has good ventilation. Scrub the area, rinse, and allow it to dry completely before continuing to clean around the window.
Some mold can be hazardous. If you have concerns about dealing with mold yourself or if mold covers an area larger than 10 square feet, contact a professional.
Clean the Window Sill, Frame and Tracks
Open the window and use a crevice tool to vacuum away loose dirt, debris, dust and dead insects. For remaining dirt and grime, use a damp cleaning cloth to wipe away as much dirt as possible. A plastic putty knife can help you get the cloth into tight corners and crevices. Use it carefully to avoid damaging the frame or tracks. Wipe the frame and tracks dry.
Clean the Window Ledge and Casing
Clean the window ledge just below the window interior. Remove loose dust and dirt with a duster or cleaning cloth. For any dirt that remains, dampen a cleaning cloth with an all-purpose cleaner or a solution of a couple drops of mild dishwashing detergent and water. Wipe down the window ledge and the window casing — the moulding surrounding the window. Don’t use too much of the solution on the ledge and casing because too much moisture can damage the wood, paint, or finish. Wipe the window ledge and casing dry.