

Tools and Materials
Staining Wood With the Right Color


Before you get started with a wood staining project, you’ll need to select your color. Traditionally, brown tones are common on furniture, moulding and other interior projects. But wood stains in black, white and gray have also become very popular. If you prefer a bold pop of color, you can find interior wood stains available in more than 200 tintable colors.
Follow the manufacturer’s instructions for any chemical, cleaning product, paint, stain or finish. Wear the appropriate safety gear, including cleaning gloves and, if necessary, a respirator. Work in an area with good ventilation. Wear eye protection and a respirator when sanding.
Prepare for Staining Wood
Preparing the wood for staining creates the smoothest finish.
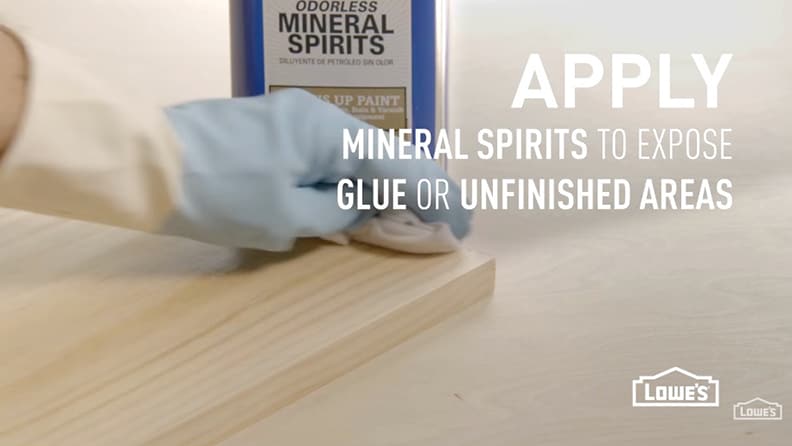
Staining Wood: Preparation


Apply the Wood Stain
Follow these instructions to apply the stain to the wood.
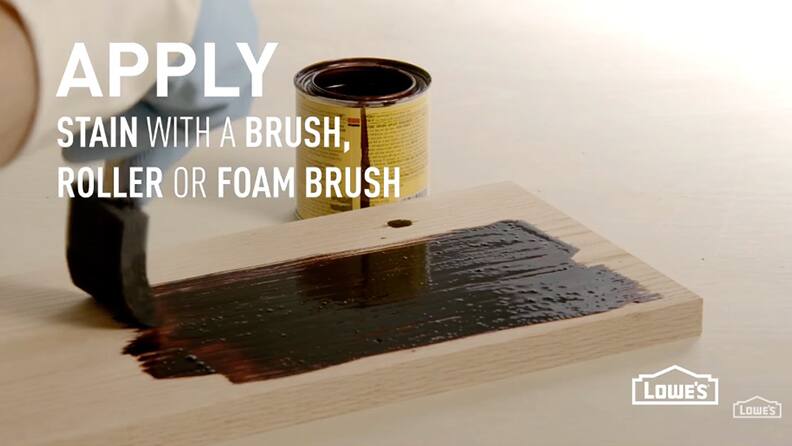
Staining Wood: Applying the Stain


Apply a Topcoat Over the Wood Stain
Follow these steps to apply the topcoat.
Staining Wood: Applying a Topcoat


How Do I Restain Wood Furniture?
The basic steps for how to stain wooden furniture are the same as the steps above, but if you’re restaining furniture that already has a stain applied, you’ll need to use the method we describe below in Can You Stain Wood Over Stain? or you’ll need to strip the existing stain away. Take a look at our project, How to Refinish Wood Furniture, for tips on stripping and staining wood furniture.
How Long Does It Take Wood Stain to Dry?
Drying times depend on the product and application. For example, some water-based stains are dry to the touch in an hour but require two hours to dry enough for a second coat. Some oil-based stains are dry to the touch in two hours but require up to four hours of drying before you can apply another coat. Gel stains take longer to dry. You can often apply a second coat in six to eight hours, but the finish won’t be dry to the touch for a full 24 hours. These are general estimates, so always check the label for drying times specific to your interior wood-staining product.
Can You Paint Over Stained Wood?
You can paint over stained wood if you prepare the surface correctly. Check your paint instructions, but in general:
- Clean the wood surface. Once dry, fill holes or dents according to the patch material instructions.
- Sand the wood to remove any gloss from the surface. Start with 120-grit sandpaper and do a final sanding with 220-grit sandpaper.
- Remove the dust and make sure the wood is completely dry. Apply a stain-blocking primer to keep the wood stain tint from seeping through the paint. Allow the primer to dry.
- Paint the wood surface and allow it to dry fully.
Can You Stain Wood Over Stain?
Yes, you can stain wood that already has stain. The easiest method is to use an interior stain designed to work over existing wood stains. With this method you can change the hue of the existing stain, but you can only darken it with the shade of the new stain and you can’t replace the color completely. Test the new stain on an inconspicuous area to ensure you get the look you want. Follow the new stain instructions, but in general:
- Clean the wood surface and make any necessary repairs.
- If the surface has a topcoat such as polyurethane, sand it lightly with 220-grits sandpaper. If there is no topcoat, sanding isn’t necessary.
- Apply the new stain according to the product instructions.
- Allow the new stain to dry fully.
If testing the new stain doesn’t give you the color you want, or the surface has a lacquer topcoat, you may need to strip the old finish away before applying a new stain.