
Tools and Materials
Product costs, availability and item numbers may vary online or by market.
Why Wall Preparation Is So Important
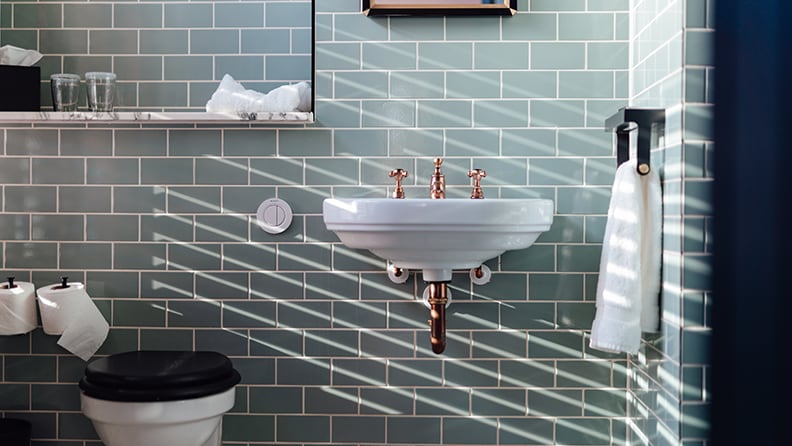
The ultimate goal of preparing a wall for tile is to create a flat, dry, solid, structurally sound surface firmly attached to the wall studs with no flexibility or movement that could damage installed tile and grout. For wet areas, you must take certain precautions before tiling the walls in a bathroom shower. Learn How to Prep a Shower Wall for Tile. Before you start, remember that using the correct trowel and mortar is critical to a successful tile project. Floor or wall, indoors or out, tile type and size all are a factor.
Getting Started

Knowing how to set tile on a wall or floor is important. It’s also important to know what kind of surface you are working with and how that can affect how to install wall tiles or floor tiles.
You may tile over existing tile, painted or unpainted drywall, plaster and textured walls. But tiling over tile can add quite a bit of thickness, so make sure your wall can handle the weight.
You should not tile over wallpaper, glossy surfaces, lead paint or plywood. If you’re not sure if you have lead paint, test kits are available. If your paint tests positive, call a professional because improper removal of lead paint can cause toxins to spread throughout your home.
To begin, turn off the power at the breaker and use a non-contact voltage tester to ensure that switches and outlets are off. Then, remove all molding, switch plate and outlet covers, hardware and anything else attached to the wall you wish to tile. Protect surrounding surfaces with drop cloths, plastic sheeting and tape, if necessary.
Temperature affects the setting time of patch materials, mortars, grouts and adhesives. Drying time slows at cold temperatures and increases in hot temperatures. Do not install tile if the work area is below freezing or the substrate (the material or layer to which you're applying another material) is frozen.
When using cleaning products, read the instructions on the container and follow any necessary precautions.
Tips for Preparing Walls

There are some things you need to do to get ready for installing tile, no matter what kind of surface you're working with.
- Remove old fittings or unused hardware, spackle the holes and sand down the spackle once it's dry.
- Repair any other cracks or holes.
- If tiling on drywall, level any uneven surfaces. Sand the wall in preparation for adhesive.
- Wipe down the wall so that you remove any dust, debris or grime.
- Sand the wall in preparation for adhesive.
- Measure the wall you're going to cover and determine how many tiles you'll need.
- Prepare for potential tile breakage during installation by buying 10-30% more tiles than you need.
- Choose the right adhesive for your job.
The above tips apply to all types of walls. Here are recommendations for specific wall types and how to lay tile on a wall.
New Drywall
If you’re working with new drywall, there’s no need to tape the drywall joints. Seal the walls with a skim coat and let it dry thoroughly. Sand with medium-grit sandpaper to create a uniform surface that’s not too smooth, because you want the tile adhesive to have something to grab onto. Thoroughly vacuum the area and give the wall a once-over with a damp sponge or cleaning cloth. Allow the area to thoroughly dry before beginning tile installation.
Painted or Textured Drywall
Scrape away any loose or peeling paint. Scrape the wall to remove any texture and create a flat surface. Patch any holes or cracks with spackling compound and sand the entire surface with medium-grit sandpaper. Vacuum to remove dust. Remove any remaining dust, oils and grease from the wall with TSP (tri-sodium phosphate) or an ammonia-based cleanser. Let the wall dry completely before beginning tile installation.
Plaster
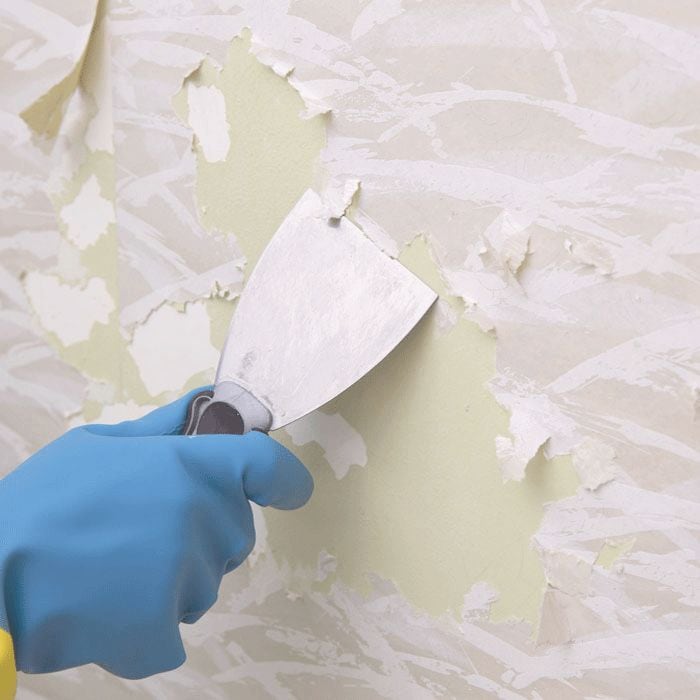
Wallpaper

Remove wallpaper and glue from the wall(s). Patch any holes or cracks with spackling compound. Once dry, sand any high spots to create a level wall. If the wall was painted prior to wallpaper installation, follow the instruction for painted or textured walls. Likewise, if you have plaster, follow the instruction in that section.
Tile
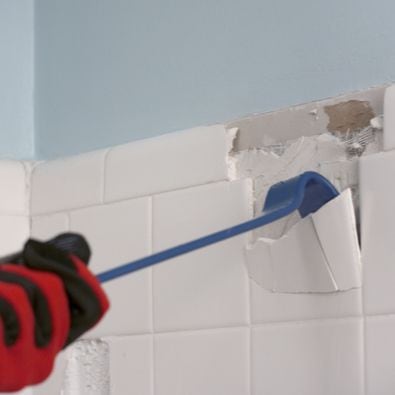
If you’re working with an existing tile wall, you have two choices: You can remove the tile and prepare the wall according to the corresponding instructions above, or tile over the existing tile.
To do so, make sure all of the tile is intact and secure. Repair any loose or cracked tile. If the existing tile is beyond repair, remove the tile and install a piece of wallboard in its place. Wash the wall with TSP (trisodium phosphate) or an ammonia-based cleaner to remove any grease or oil. This will ensure the tile adhesive secures to the surface.
Ready to get started? How to Prep and Install Bathroom Shower Tile and Learn How to Install a Tile Backsplash.
If you’re installing glass tile over colors or patterns, note that they will show through. For a smooth, opaque finish, apply the new tile with a solid white adhesive and a smooth trowel. If you use a notched trowel, the grooves may also show through the tiles.