

Tools and Materials
Tools
Product costs, availability and item numbers may vary online or by market.
Measure the Room
Determine how much flooring and materials are needed. Multiply the length of the room by the width of the room. Add about 10% to that number to account for any possible mistakes and warped boards.
Remove any carpet or other flooring. If you have vinyl flooring, you may be able to install your new flooring directly on top of it. Check the manufacturer’s instructions for additional assistance.
Getting Started
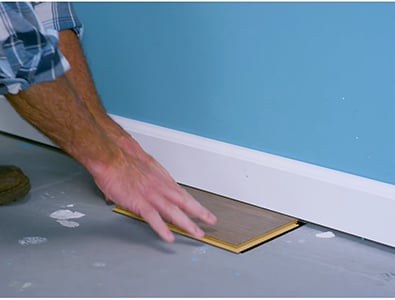
We’ll show you how to prep a concrete subfloor for the installation of either a floating laminate, luxury vinyl or engineered hardwood floor.
Engineered hardwood can also be installed over a concrete subfloor by using the glue-down method. If you plan to glue down your floor, read the manufacturer’s instructions prior to installation.
Floating floors generally require limited subfloor prep, but that preparation is essential for a successful new flooring installation. Before you begin, read the flooring manufacturer’s instructions carefully and follow any local building codes. By doing this, you’ll get the most out of your new flooring.
If you’d prefer to leave this job to the pros, Lowe’s can install your new flooring.
Preparing the Subfloor
Follow these directions to prepare your concrete subfloor.
Instructions


Establish Installation Guidelines


For a concrete subfloor, you should install the plank with the sight lines of the floor. Typical sight lines run parallel to the longest wall, but each home is different.
- Measure and mark the center of all four walls at floor level.
- Snap the chalk line over the top of the concrete or moisture barrier between the marks on opposite walls making a cross in the center of the room.
- Determine your starting wall. You will lay the flooring lengthwise to this wall.
- When possible, always begin layout or installation from the straightest wall, generally an outside wall.
- Measure from the center cross to the starting wall, subtract the manufacturer’s expansion gap, and mark on the concrete or moisture barrier by the starting wall.
- Using the center line parallel to the starting wall, measure and mark the same distance on each end of the starting wall. If your walls are not square and this distance doesn’t allow for the manufacturer’s required expansion gap, re-measure this point per the previous step and use this distance to mark the center and opposite corner measurements along the starting wall.
- Snap a line between the marks on the starting wall to form a guideline along the starting wall. You will lay the flooring lengthwise along this line.
You are now ready to install laminate or hardwood flooring in your room or home.