
Start with the Basics
Before you get started on building your outdoor canopy, let’s get the basics down. Things like the material, color and type of canopy are important to consider if you want your DIY canopy idea to be successful and practical.
Canopy Material


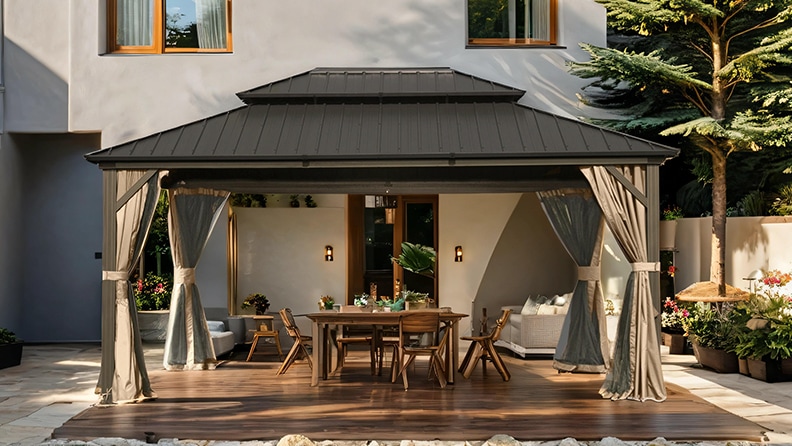
The foundation of a canopy is its sturdy metal frame. This frame provides the structural support and shape for the entire structure. It’s usually made of aluminum or steel and is designed to be durable and weather-resistant. The most visible part of a canopy is its roof, which is made from durable fabric materials like polyester.
To ensure stability, canopies often feature weight plates at the base of the frame. Weights anchor the canopy to the ground, preventing it from tipping over or blowing away. While the metal frame is built to last for many years, the fabric roof may eventually need to be replaced due to wear and tear.
A canopy
replacement top can be easily swapped out with the existing frame, to
help refresh your canopy's appearance.

Frame
Popular materials for the frame include aluminum, steel and cedar wood. These are considered sturdy and durable.
Roof
The material used for the roof is essential as it is essentially a barrier against the sun and rain. The most preferred fabrics include polyester, plastic and PVC-coated polyester. PVC polyester is water-resistant, tough, flexible and durable.
Types
There are three basic
types:
- Wall-mounted canopies: These are fixed to a wall of your home and don’t require much space. They are versatile in their shapes depending on their placement.
- Free-standing canopies: These support themselves and are a good alternative to wall-mounted canopies. You can install these anywhere.
- Pop-up canopies: These have a four-leg structure and are essentially portable tents.
Canopy, Pergola or Gazebo?
Canopies are temporary structures that are highly portable. However, they are not designed for long-term use and offer limited protection from harsh weather. Pergolas are semi-permanent structures with a partially open roof and supported by posts They can be freestanding or attached to your house. They allow ventilation while protecting you from the sun. A gazebo is characterized by an enclosed roof, a floor and walls. This is a permanent free-standing structure that offers complete shade and privacy but is the least portable option.
Consider the following
factors when deciding between a canopy, pergola or gazebo.
- Purpose: Your decision would be based on whether you prefer a semi-permanent eating area, temporary shade or a fully enclosed space for your backyard. If you require a portable shade, a canopy would be the best option.
- Protection: A gazebo offers the most protection from extreme weather while a canopy offers limited protection.
DIY Ideas for Preassembled Canopies
If you already have an
outdoor canopy and want to spruce it up or if you want to get one and work your
magic on it, these DIY canopy ideas might help.
Fairy Lights

This is a relatively
simple idea but can elevate the look of any outdoor canopy. Adding fairy
lights, light bulbs and lanterns can create a warm and inviting look. This can
make your pop up canopy a good spot for evening events and entertaining guests.
You can DIY this by attaching hooks to your canopy posts and hanging your
string lights to make your backyard light up.
Tropical Canopy Idea
Convert your backyard into a
tropical haven by adding beach elements to your canopy. This idea works well
with a cedar
wood frame free standing pergola with a canopy. Attach a one-person
outdoor swing inside your canopy where you can curl up with a book during
summer nights. Include elements like leaf-printed pillows and wave detailed
outdoor rugs to create a tropical look. You could even hand paint a beach scene
and hang that on one side of the outdoor canopy.
DIY Backyard Canopy Ideas
If you’re a DIY
enthusiast who wants to create your own canopy from scratch, take a look at
these ideas to get inspired.
Canvas Cloth Canopy
This outdoor canopy
idea is perfect if you want to add a covering to your patio and don’t
have a lot of space or budget. This essentially involves attaching the cloth
canopy to your wall directly, instead of to a frame. Do this by getting a
canvas cloth and dyeing it any color you like. Attach grommets along the edges
of the canvas cloth. Then drill cup hooks to your wall to tie the canopy to.
Add rope or ties to the grommets to attach the canopy to the cup hooks.
Consider dyeing the canvas a
darker shade to block the sun during the day.
Tarp Canopy
If you don’t want a permanent
shade for your patio, a temporary cover works just as well. If you have an
extra tarp lying around, that’s all you need to make a canopy. You need some
sturdy poles or PVC pipes for the frame and rope or bungee cords to secure the
tarp. Another important element of making this canopy is getting heavy duty
stakes or anchors to keep the canopy grounded. A hammer, saw and
drill
are tools that will aid in this project. You may also need PVC joints to
connect the pipes to make a rectangle or square frame.
Backyard Canopy Bed
Set up a comfortable sofa
bed in your backyard to lounge on and cover it with a DIY canopy. This project
involves extending timber bed posts to act as frames for the canopy. If it
rains in your area, it might be better to use a waterproof fabric. Similarly,
use a water-resistant fabric as a cover for the mattress.
To make the bed posts, cut the
wood into pieces and then screw them together. Using a cable binder, bind the
wood posts to the posts of the sofa bed. Once you have the fabric ready, sew
cotton ropes or strings to the fabric on the corners. Tie these to the wood
frames and you’re all done. You are now ready for summer with this convenient
lounging spot.
Mosquito Net Canopy Shade
Protect your patio from
mosquitoes with a mosquito net canopy. Start by measuring the perimeter of your
canopy frame and cut the net accordingly, leaving some extra fabric for pleats.
To attach the mosquito
net to your canopy frame, attach velcro or hook and loop tape to the top of the
canopy. Place the edges of the mosquito netting between a bias tape and the
velcro to secure it in place. Sew it all together and attach curtain weights to
the bottom to prevent it from blowing away. You can add some flair to the
fabric by creating pleats with grommets.
Features to Consider
To make your DIY backyard
canopy last longer and look appealing through the years, be mindful of these
considerations.
Mold/Mildew Resistant
Mold has a tricky way of
seeping into wood and other materials to cause rotting and damage. After all
the work that you do to set up a DIY canopy, having mold dampen your plans
isn’t a great feeling. So make sure to apply mold resistant additives to paint
your wood to make it last longer.
Water Resistant
Water can cause the metal to
rust over time. This can lead to water damage. Rain or shine, make your DIY
canopy idea brilliant by making your canopy waterproof. For a convenient
solution, a waterproof
spray can save time and energy and give you the results you need.