
Tools and Materials
Tools
- Pneumatic Nailer
- Portable Air Compressor & Hose
- Drill & Bits
- Circular Saw
- Jigsaw (Optional)
- Hammer
- Post Hole Digger
- Digging Bar
- Auger Powerhead & Bit (Optional)
- Shovel
- Mortar Hoe
- Garden Hose
- Rafter Square/Triangle Square
- Speed Square
- Tape Measure
- Level
- Post Level
- Wheelbarrow
- Ladder
- Work Gloves
- Eye Protection
- Hearing Protection
Materials
- 4-in x 4-in Pressure Treated Posts (Actual: 3-1/2-in x 3-1/2-in
- 2-in x 4-in Pressure Treated Lumber (Actual: 1-1/2-in x 3-1/2-in)
- 1-in x 4-in Furring Strips (Actual: 0.718-in x 3.437-in)
- Concrete Mix
- Exterior Screws
- Mason Line
- Fence Pickets (Pressure Treated or Cedar)
- Fasteners for Pickets (Nails, Screws or Staples)
- Gate Hardware Kit
Product costs, availability and item numbers may vary online or by market.
Preparing to Build a DIY Privacy Fence


From laying out your new fence to figuring out how to attach fence panels to posts, a lot goes into building a wood privacy fence. Wondering how to install a wood fence properly? Before starting wood fence installation, you’ll need to do some prep work.
-
Check out different wood fence ideas before installing a fence in the backyard.
-
Check local codes and homeowners association guidelines that might govern fence design, size and placement. Codes may also specify post hole requirements.
-
Determine if a permit is necessary for your DIY privacy fence.
-
Know your property lines and boundaries, and discuss your plans with neighbors along your proposed fence line.
-
Plan gate post locations. Gate pickets should be flush with the inside faces of the posts. Plan your gate size to use full pickets.
-
Use graph paper to draw a plan for your fence design. Note the post locations and gate locations. Some towns might require this plan for an approved building permit.
-
Consider gate hardware. Each set attaches differently, and you’ll need to take that into account for gate post spacing.
-
Find a helper for wood fence installation. You’ll need an extra set of hands for this project.
As an alternative to a wooden fence for backyard privacy, you can build a vinyl fence. Installing a chain link fence with privacy slats (the slats slide through the mesh, blocking the view) is another way to create a DIY privacy fence. Learn about different fence materials — including vinyl, wood and chain link — with our guide to fence materials.
Before beginning any excavation while building a fence, call 811 to check for underground utilities.
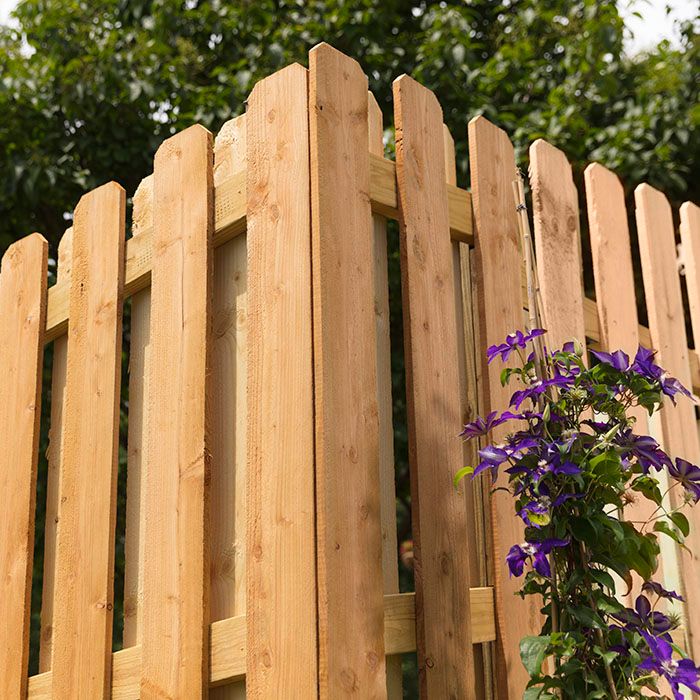
Installing a Shadowbox Wood Fence

The instructions below show you how to build a DIY privacy fence. This shadowbox fence has pickets alternating on each side, offering some privacy but allowing you to look through the fence at an angle. A solid fence has all pickets attached tightly together on the outside only, blocking views and offering complete privacy.
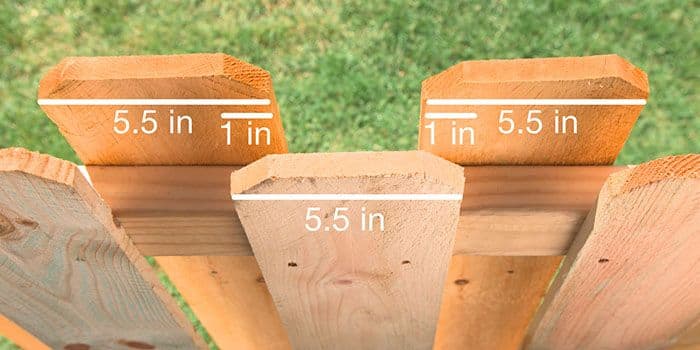
This component-built fence, for which you attach the pickets individually rather than in preassembled fence panels, will use 6-foot pickets that are 5-1/2 inches wide. The space between the pickets will be 3-1/2 inches. The pickets on the opposite side will line up over the 3-1/2-inch space, creating a shadowbox effect.
While preassembled wood fence panels make a new fence project faster, a component-built fence will follow the contours of your yard better.
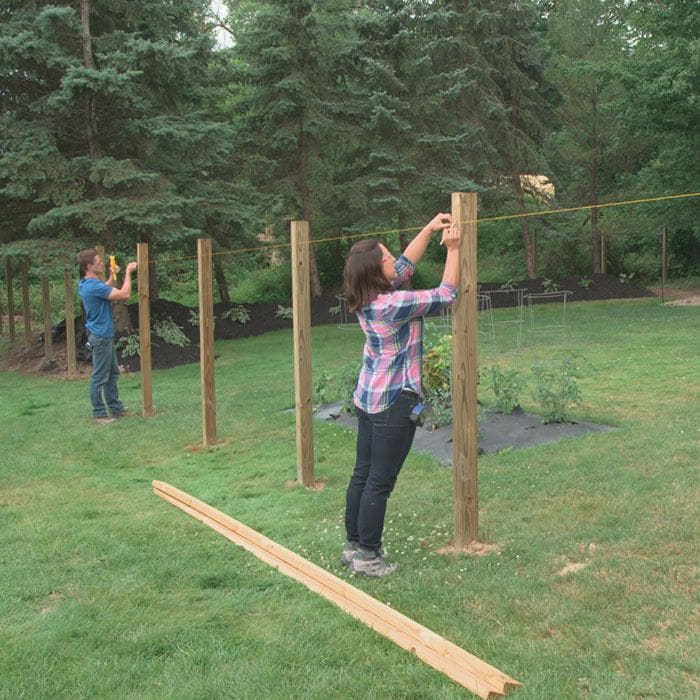
Marking the Fence Layout and Post Locations
Follow these steps to mark the layout and establish the post locations.
Instructions


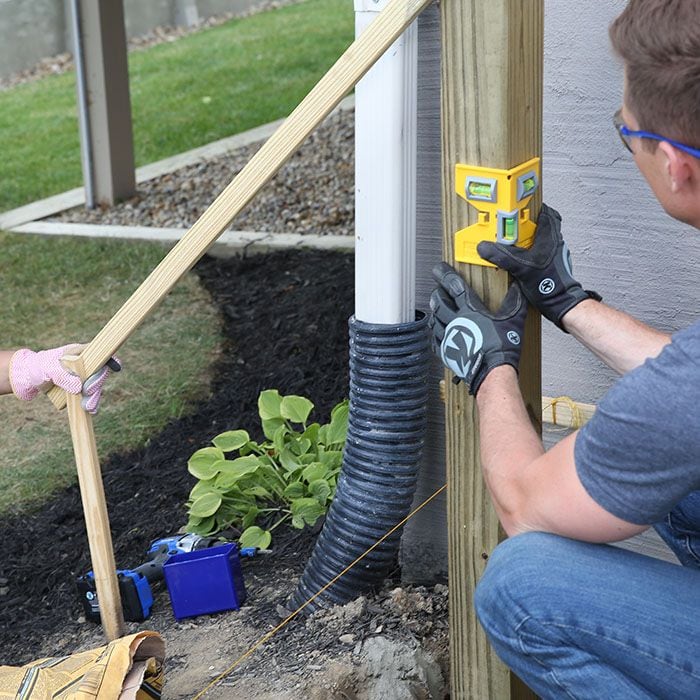
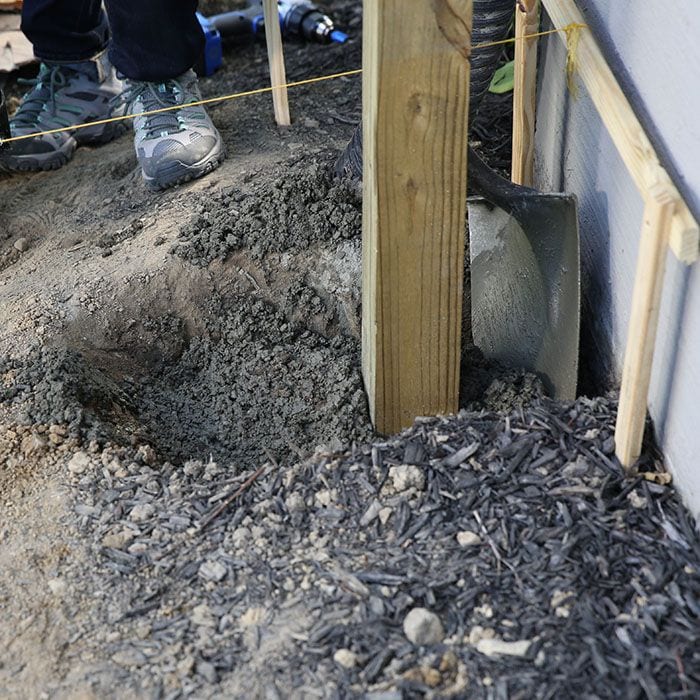
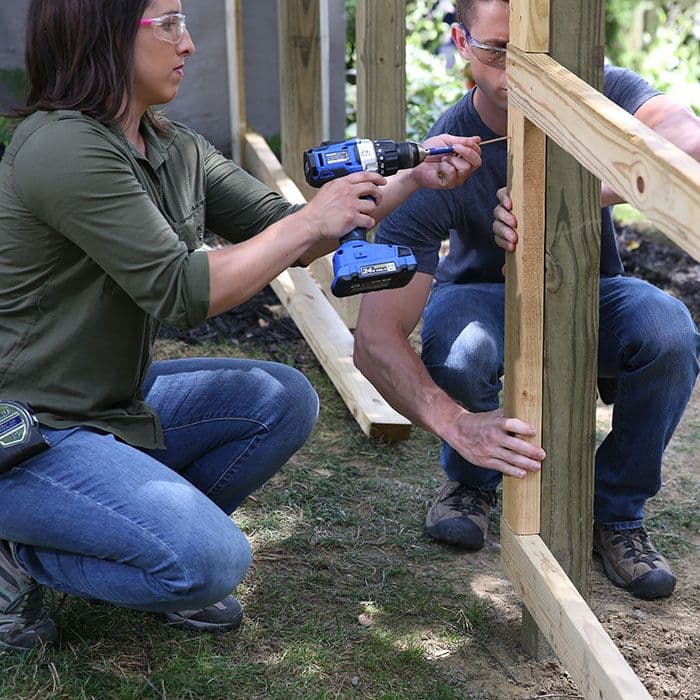
Digging Holes and Setting Fence Posts
Follow these five steps to dig your post holes and set the fence posts.
Instructions

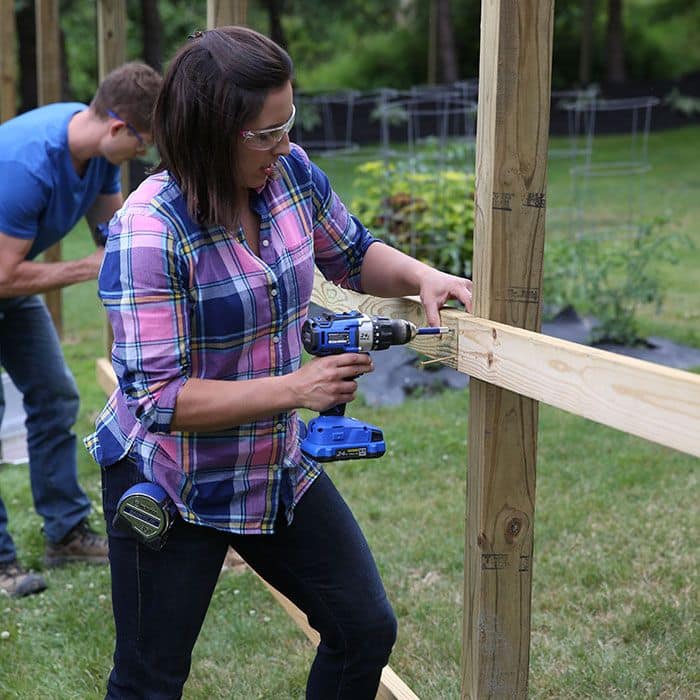
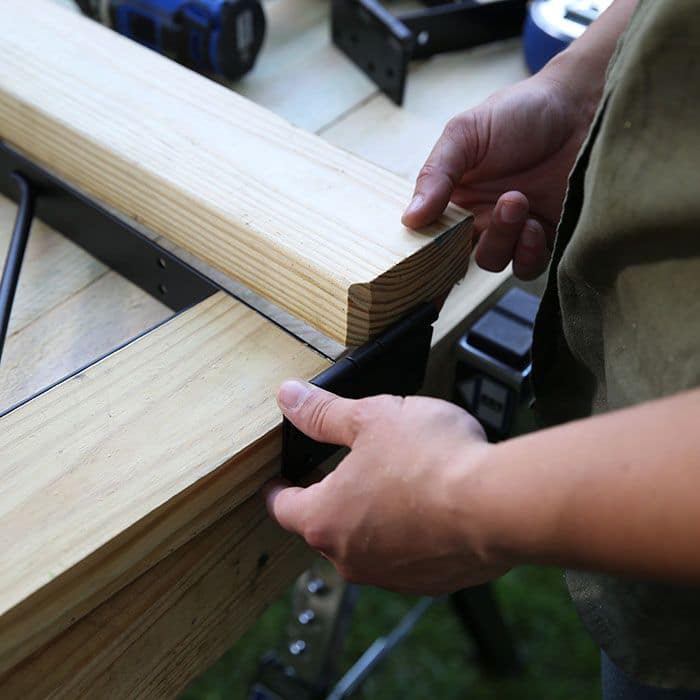
Installing the Fence Rails
Follow these five steps to install the fence rails when building a fence.
Instructions

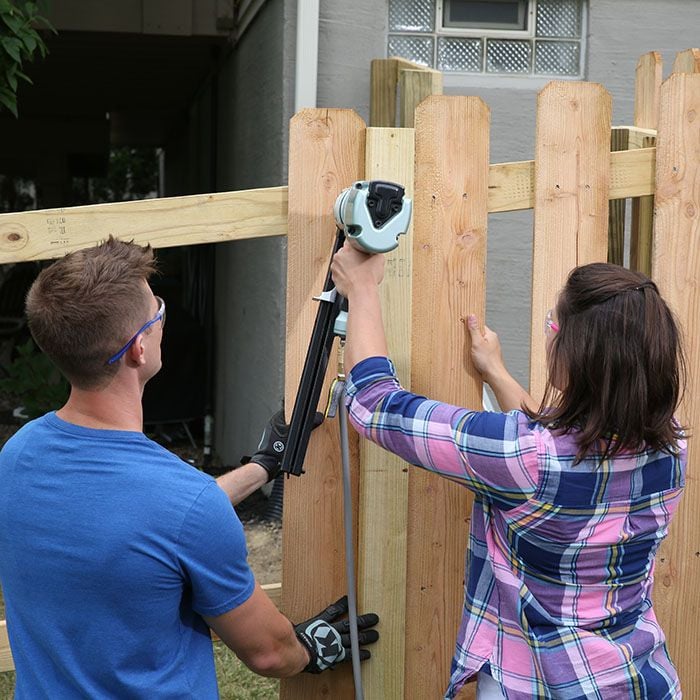
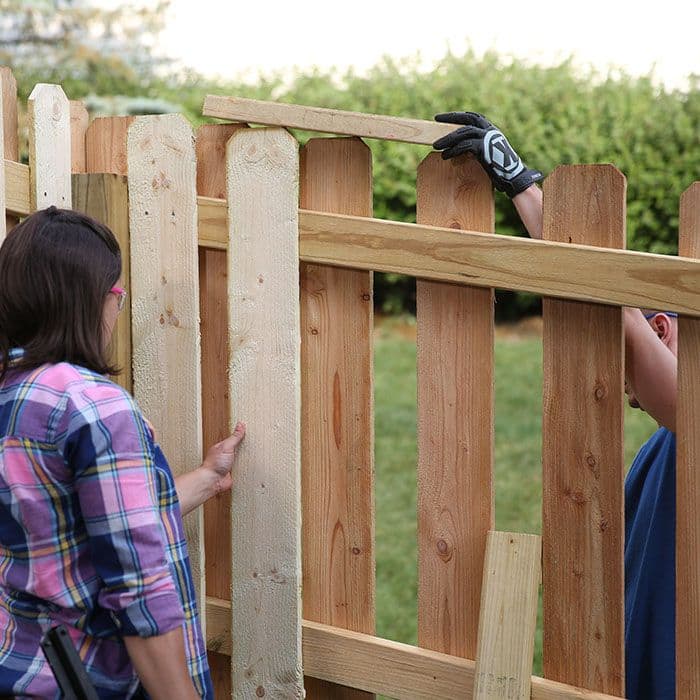
Installing the Fence Pickets or Fence Panels
Wondering how to install fence panels? The most important factor in putting up fence panels is to ensure they're as straight as possible, horizontally. One of the keys to installing fence pickets, or fence panels, is keeping the top of them at a uniform height. For this fence, the bottom of the pickets will be about 1-1/2 inches above the ground. There are a couple of ways to keep them at the correct height.
Top String Wood Fence Installation
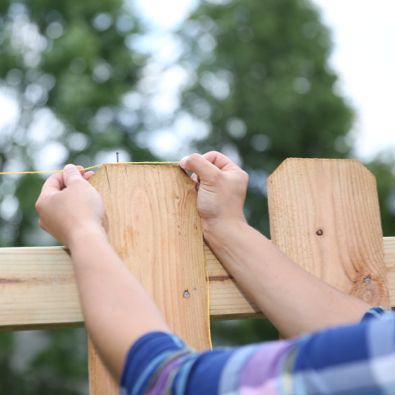
-
Install corner pickets at the desired height and tap a nail into the top of each picket.
-
Run a string between the nails.
-
Line up the tops of the remaining pickets with the string. Don’t push on the string while installing.
-
This process works best in areas where the slope doesn’t change much.
-
Alternatively, use a string tied at the desired level for the bottom of the pickets.
2-Inch-by-4-Inch Guide Wood Fence Installation Guide

- Set a 2-inch-by-4-inch board on its face to use as a 1-1/2-inch guide along the bottom.
-
Set each picket on the board as you’re installing along the slope.
- This method is helpful in areas where the slope is uneven and changes frequently.
During wood fence installation, you may notice that pickets will have a slight green color from the treatment process. This coloring will fade over time.
Instructions


Building and Installing the Fence Gate
When building a fence gate, you'll need a gate hardware kit. The hardware keeps the gate square and prevents sagging over time.
Instructions


Finishing and Maintaining Your Fence
After you learn how to build a wood fence, you'll want to make sure you know how to properly maintain it. Wait a few months before staining or painting to allow the lumber to dry completely. Pressure treated lumber should be stained or painted every few years. Follow the product manufacturer’s guidelines for preparation and application.
Working With Pressure Treated Lumber
Guidelines
- Use fasteners and hardware labeled for treated lumber — stainless steel or hot-dipped, galvanized screws.
- Drill pilot holes in the ends of boards to prevent splitting when you nail or screw them together.
- Use wood rated for ground contact when necessary for the project.
Safety
- Wear a dust mask and eye protection when handling or cutting wood.
- Wash your hands after working with treated wood.
- Dispose of sawdust and waste according to local regulations.
- Don't burn pressure treated wood.
- Don't use pressure treated wood as mulch.
- Read more about pressure treated lumber and wood preservatives on the EPA website.
Don’t have time to do this project yourself? Check out our professional fencing installation service.