

Tools and Materials
Tools
- Drill/Driver & Bits
- Impact Driver
- Circular Saw & Blades
- Compound Miter Saw
- Jigsaw
- Hammer Drill
- Masonry Drill Bit
- Hammer
- Hand Saw
- Ratchet
- Ratchet Sockets
- Tape Measure
- Chalk Reel
- Long Level
- Post Level
- Combination Square
- Speed Square
- Framing Square
- Stair Gauges
- T-Bevel
- Clamps
- Saw Horses
- Work Gloves
- Eye Protection
- Hearing Protection
- Dust Mask
- Earth Auger (Optional)
Materials
- 2-in x 4-in Pressure-Treated Lumber (Actual: 1-1/2-in x 3-1/2-in)
2-in x 8-in Pressure-Treated Lumber (Actual: 1-1/2-in x 7-1/4-in)
- 2-in x 12-in Pressure-Treated Lumber (Actual: 1-1/2-in x 11-1/4-in)
- 5/4-in x 6-in Pressure-Treated Decking (Actual: 1-in x 5-1/2-in)
- 2-in x 6-in Pressure-Treated Lumber (Actual 1-1/4-in x 5-1/4)
- 2-in x 2-in Pressure-Treated Deck Balusters (Actual: 1-31/100-in x 1-31/100-in)
- 2-in x 4-in Board (Actual: 1-1/2-in x 3-1/2-in)
- Furring Strips
- Stringer Hangers/Stair Brackets
- Deck Post Bases/Brackets (Optional)
- Railing Post Anchors/Deck Ties
- Carriage Bolts Rated for Pressure-Treated Lumber
- Washers Rated for Pressure-Treated Lumber
- Nuts Rated for Pressure-Treated Lumber
- Deck Hardware Nails Rated for Pressure-Treated Lumber
- Deck Screws
- Concrete Anchors
- Post Caps (Optional)
- Mason Line (Optional)
- Pre-Cut Pressure-Treated Stringers (Optional)
- Outdoor-Rated Metal Handrail & Fittings (Optional)
Product costs, availability and item numbers may vary online or by market.
Deck Stair Basics

This deck already has wood decking and deck railings installed. Learn the details in How to Build a Deck: Wood Decking and Railings.
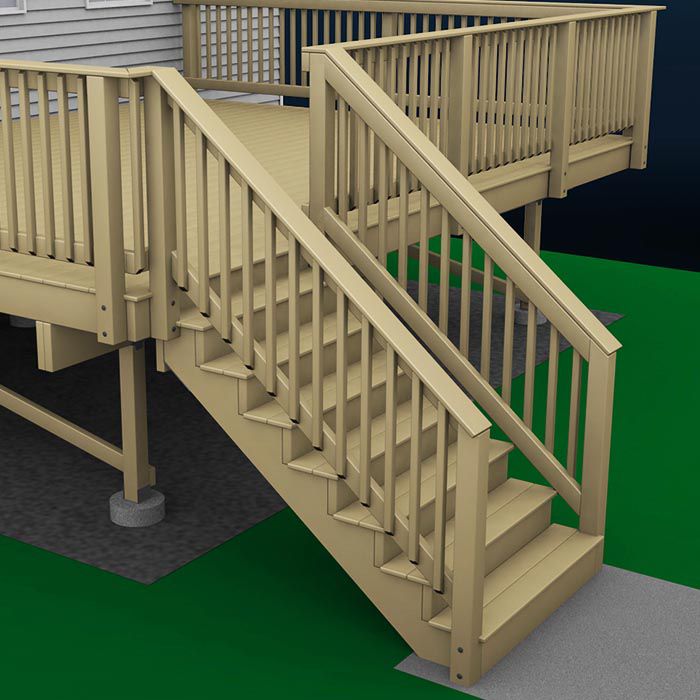
Deck stairs are typically made from 2 x 12 stringers spaced about 12 to 16 inches apart. They rest on a solid foundation and are attached to the deck with hangers. They have risers (also called toe kicks), treads and railings. The stairs should be at least 36 inches wide.
You can build your own custom stringers or buy pre-cut stringers at Lowe's. Custom-built stringers allow you to match the dimensions of a set of stairs in your home, which will feel most comfortable. Whichever you choose, always make sure you follow building codes.
Some codes require toe kicks.
Stair Measurements

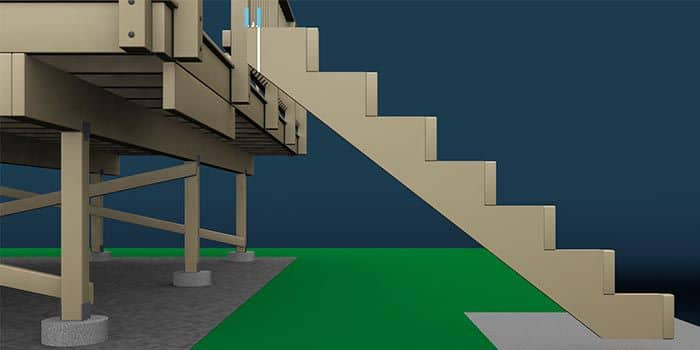
Determine the location of your bottom step. Set a long level on top of the decking and measure the height at the point where you want your steps to end. Use this measurement to determine the number and height of the risers.
For example, if the height is 55 inches, divide this measurement by 7, the ideal height in inches for each step. Round to the nearest whole number to get the number of risers — in this case 8. Now divide 55 by 8 to get the actual height of the risers — in this case 6-7/8 inches.
55 ÷ 7 = 7.86 rounded up to 8 risers
55 ÷ 8 = 6.875 or 6-7/8 inches
If you use the deck itself as the top riser as with this deck, subtract one step.
This deck will have treads made of 5/4-inch x 6-inch decking planks — two for each step — making the run for each step (the distance front-to-back) about 11 inches. It also has 2-inch x 6-inch risers or toe kicks on the back for a clean look.
Combine the run of all your steps to get a total run length. Use this measurement to determine where to build your landing support.
You may want to check the height of steps or stairs that are already familiar to you, such as interior stairs or porch steps, to get a sense for a comfortable height. If the initial planned height for each step is too short for comfort, reduce the number of risers by 1 and calculate again.
You’ll often see decking boards listed with a common (or nominal) measurement of 5/4 inch thick. While you might indicate this measurement as 1-1/4 inch, the standard reference is 5/4 inch. Also note that the actual measurement of the thickness of a 5/4-inch board is usually 1 inch. See our video Why Is a 2 x 4 Not 2 by 4? to learn about the difference between common/nominal measurements and actual measurements.
Creating a Stair Landing
When building deck stairs with a landing, you need to consider the material you want to use for the landing pad. The decision may come down to a combination of personal preference, the location and design of the deck, and building codes. Although you’ll need to check your local building authorities to know for sure what’s required, most codes mandate that all outdoor staircases have a landing. This is to ensure that there’s a safe place to enter and exit the stairs as well as a sturdy, reliable surface to support the base of the stairs.
Although the following isn’t an exhaustive list, here are some typical code requirements to think about for stair landings:
- Stair landings are often required to be nearly completely flat, typically less than 1/4 inch of slope per foot or less.
- For decks on the second floor or higher, you may be required to add one or more landings to the staircase.
- For cold climates, the stringers must rest on a structure with support that extends below the frost line. This ensures the stringers won’t move due to the ground freezing and thawing.
- There may be size or dimension requirements for a landing pad.
- A landing pad typically must be as wide or wider than the width of the stairs.
When it comes to materials for your deck landing, concrete is the most long lasting. If built correctly, a concrete pad should last the lifetime of the deck. However, the installation is a major undertaking. A concrete landing can be designed in two main ways. You can either secure the stair stringers to the concrete pad — which means you’ll need footings under the pad that are buried below the frost line — or you can attach the bottom of the stair stringers to concrete footers and build a free-floating pad that isn’t connected to the stairs.
If you don’t like the look of a concrete landing pad, you can also build one out of brick or flagstone pavers. These materials are very affordable, and you won’t have to dig as deep as you would for a concrete landing pad. The installation also takes less time since you won’t have to wait for the pad to cure before completing your deck. Just as with a free-floating concrete pad, if you choose to use brick or pavers, the deck stair stringers will need to be mounted on top of concrete footers that reach below the frost line. Although a brick or paver landing pad will require much less initial effort to install, it’ll require some upkeep. Bricks and pavers will shift over time as the ground settles, which means you’ll have to periodically dig them up and level them.
Check out How to Build a Concrete Slab and How to Build a Deck: Post Holes and Deck Framing for more help.
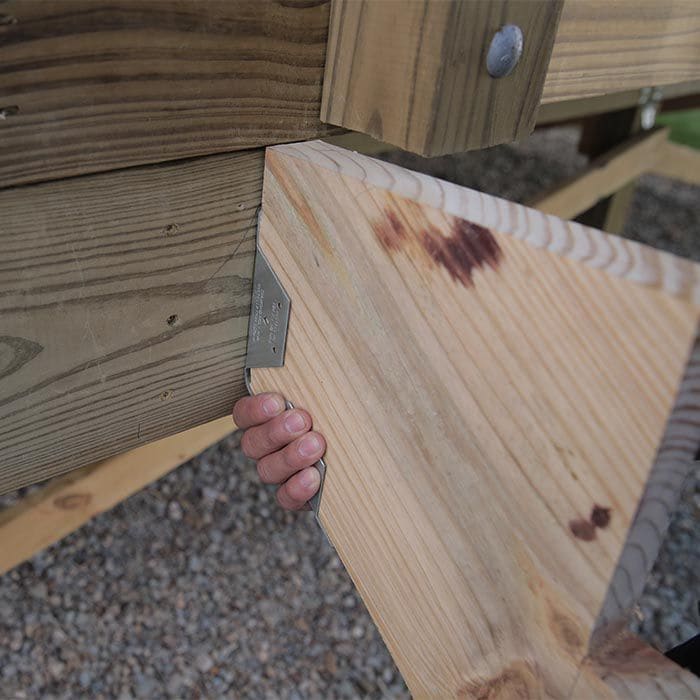
Cutting the Stringers
When you have determined rise and run and installed the landing, you can mark the stairs on 2 x 12s to create stringers.
Instructions


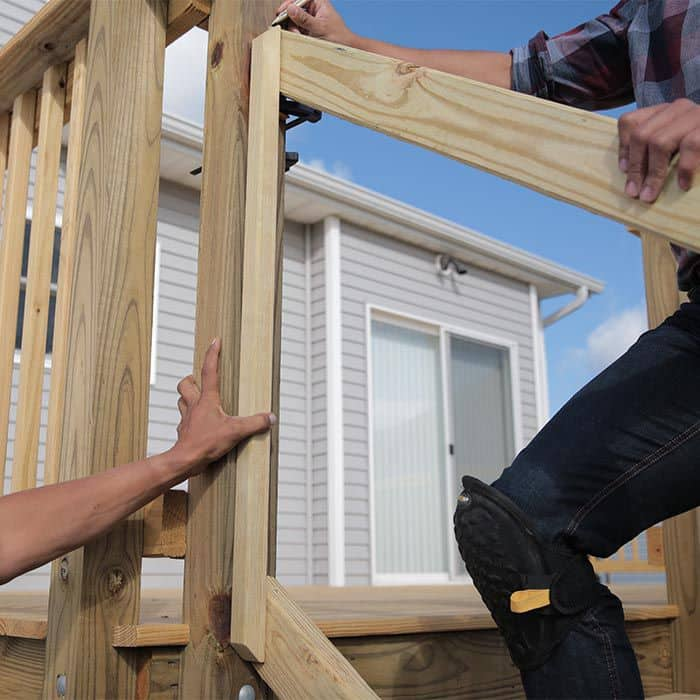
Attaching the Stringers, Toe Kicks and Treads
You'll attach the stringers to the deck and secure them to the landing with anchors installed in the concrete. Once the stringers are secure, you can add the toe kicks and treads.
Instructions


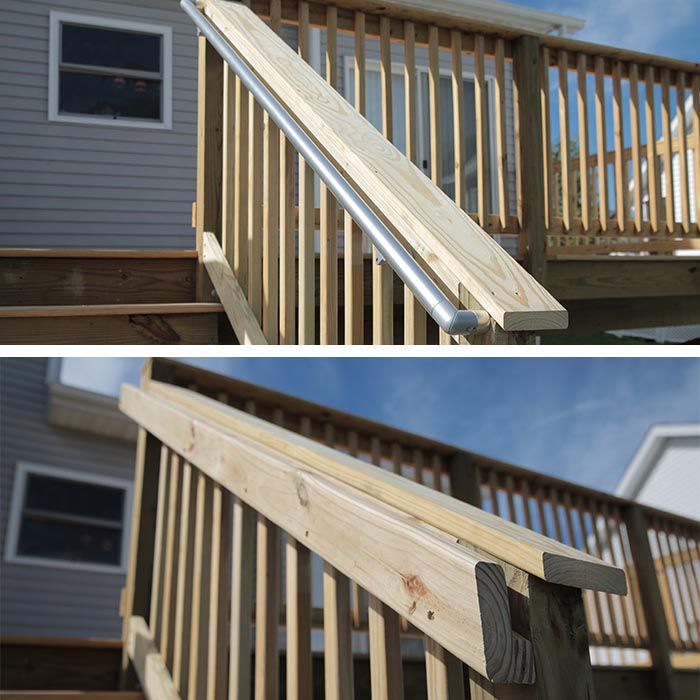
Installing the Stair Railings
For our deck, the stair railings consist of 2-by-4 top and bottom rails, 5/4-by-6 rail caps and 2-by-2 balusters. Your dimensions may vary depending on the layout you’ve selected.
The best deck railing height for your design will be determined by local building codes. In some cases, there may not be any railing height requirements for a low-platform deck, but there may be for a high-platform deck.
The most common heights for deck stair railing systems are between 34 inches and 38 inches, but you can also find them in the following heights:
Instructions


Working With Pressure-Treated Lumber
Guidelines
- Use fasteners and hardware labeled for treated lumber — stainless-steel or hot-dipped, galvanized screws.
- If the lumber is wet — it typically is when delivered from the store — butt it together tightly when building. Pressure-treated wood shrinks as it dries.
- Drill pilot holes in the ends of boards to prevent splitting when you nail or screw them together.
- Use wood rated for ground contact when necessary for the project.
Safety
- Wear a dust mask and eye protection when handling or cutting wood.
- Wash your hands after working with treated wood.
- Dispose of sawdust and waste according to local regulations.
- Don't burn pressure-treated wood.
- Don't use pressure-treated wood as mulch.
Read more about pressure-treated lumber and wood preservatives on the EPA website:
Finishing Touches
With the basic build for the deck complete, think about accessorizing your new outdoor space. See Upgrade Your Deck and Add Finishing Touches to get deck furnishing ideas.
Watch the complete deck series at Lowes.com/BuildaDeck.