
Tools and Materials
Tools
- Tape Measure
- Angle Grinder
- Speed Square
- Level
- Spade Shovel
- Masonry Chisel
- Garden Hose
- Garden Hoe
- Brick Trowel
- Concrete Float
- Caulk Gun
- Rubber Mallet
- Tuck Pointer
- Jigsaw
- Circular Saw
- Safety Glasses
- Work Gloves
- Respirator/Safety Mask
- Hearing Protection
- Drill
- Hammer
- Utility Knife
- Pry Bar
- Oscillating Multipurpose Tool
- Shop Vacuum (Optional)
Product costs, availability and item numbers may vary online or by market.
Don't have all these tools handy? Lowe's offers tool rental for DIY projects.
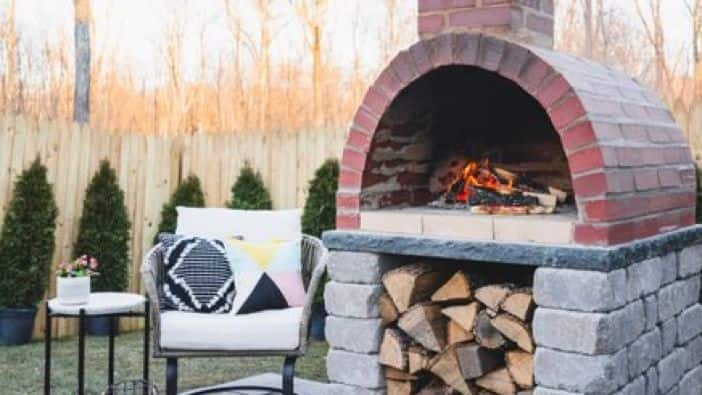
Enjoy Wood-Fired Pizza at Home
If you love making pizza, a wood-fired pizza oven may be for you. Pizza ovens cook in a way that stoves or grills can’t. They're great for entertaining, whether they're used as part of an outdoor kitchen or as a stand-alone oven.
How Much Does it Cost to Build an Outdoor Pizza Oven?
Building an outdoor pizza oven yourself will cost less than buying and installing one that's pre-made. A professionally installed pizza oven costs around $3,500, depending on your location and materials. Depending on materials and the size, a DIY pizza oven could range from a few hundred dollars to $1,000 or more.
How Long Does it Take to Build an Outdoor Pizza Oven?
The time it takes to build a DIY pizza oven can range anywhere from a few hours to a couple of weekends, depending on the materials you use. Certain materials, like mortar and masonry adhesive, need time to cure, which can add significant time to the project. A kit can make the project go faster.
Choose a Location for Your Pizza Oven
Deciding where to build your pizza oven is an important step in the process.
Design and Measure
Once you've selected a location for your pizza oven, it's time to determine the design. There are many ways to make a pizza oven of different shapes and sizes from materials including clay, concrete and brick. It really will depend on your location, preference and DIY skill level.
For this design, we're making a dome-shaped wood-burning oven built from retaining wall block and brick with space for firewood storage in the base.
Consult with a professional to ensure you’re using the correct materials, build process and installation for your specific application.

Build the Base
Now it’s time to get the base ready. The base for this design is 3-feet-by‐3-feet to accommodate a 36-inch oven. If you decide to make your oven larger or smaller, the base will scale accordingly (for example: 4-feet-by-4-feet to accommodate a 48-inch oven, 2-feet-by-2-feet to accommodate a 24-inch oven, etc.). It's a good idea to do a dry run by placing your first course without mortar to see how the layout looks.
Depending on the location, you may need to build a concrete slab foundation for the oven to sit on. We’re able to use our existing paver patio. If you're using concrete blocks for the base, there's no need to worry about the heat of the oven, so these base blocks don't need to be fire rated.
For more on building a slab, read our guide — How to Build a Concrete Slab.
Cut the Blocks
Build the First Row


Cap the Base
Once the base courses are complete, the next step is to set the capstone where the oven will be placed.
Set the Capstone


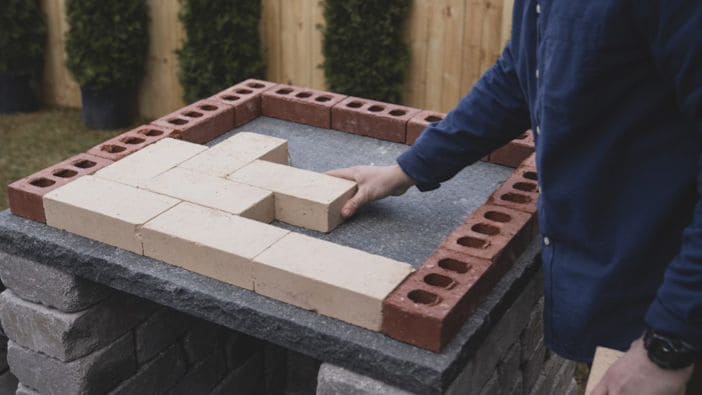
Lay the Bricks
Now that the base and capstone are in place, it's time to start on the oven.
Lay the Bricks

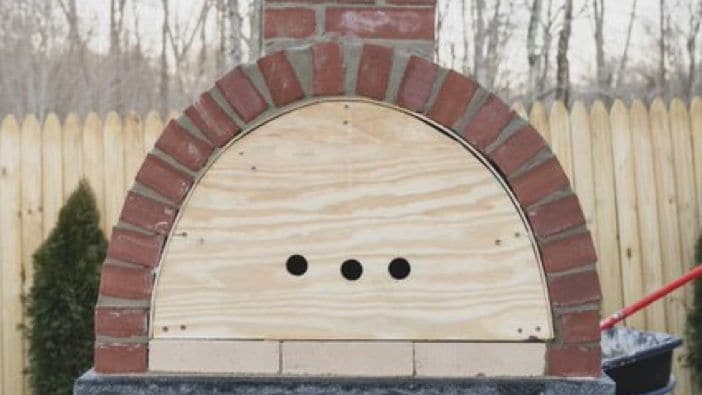
Create an Oven Dome Support
Before you can lay the bricks in a dome shape, you'll need to first create a mold or dome support. This will be a temporary structure that you’ll remove once the oven is completed. When cutting lumber, wear appropriate safety gear such as eye protection, a respirator or dust mask, and hearing protection.
Make the Oven Dome Support


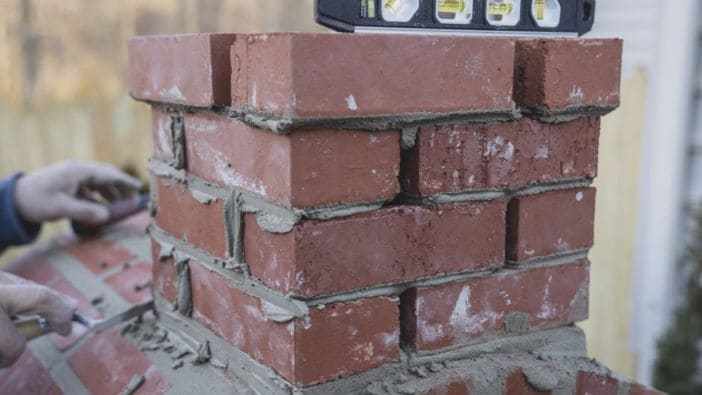
Build the Brick Dome
Now that you have a dome support, it’s time to lay the bricks around it.
Build With Mortar and Bricks


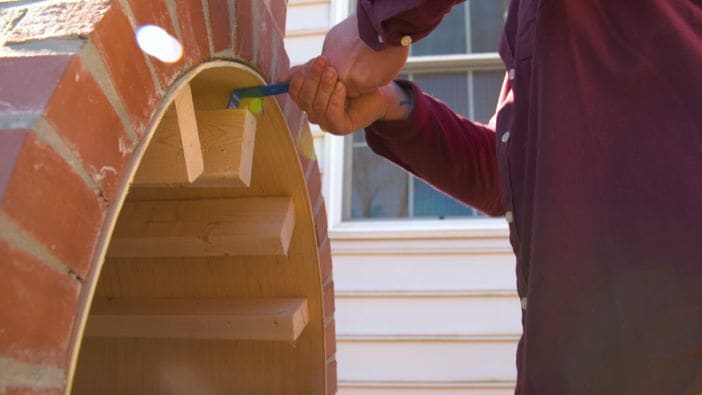
Remove the Dome Support
Once the mortar is dry and set, it'll separate from the interior wood dome mold so you can remove it. For the removal process, you’ll need a drill, hammer, utility knife, pry bar and an oscillating multitool.
Wear work gloves and eye protection when removing the mold.

More Than Pizza
If you're not ready or able to tackle a backyard DIY project on your own, we've got you covered. Pre-built pizza ovens take the hassle out of pizza-making. Pizza ovens are versatile because you can smoke and slow-cook meats, roast vegetables and even bake bread.
Brick Oven Cheese Pizza Recipe


It's time to break in your new pizza oven. With just a few ingredients, you can enjoy this delicious cheese pizza in no time.

Brick Oven Cheese Pizza
- Raw pizza dough (store-bought or homemade)
- 8-ounce fresh mozzarella cheese ball
- 28-ounce can whole peeled tomatoes
- Fresh basil leaves
- Olive oil
- Cornmeal
- Allow your pizza dough to come to room temperature.
- Sprinkle cornmeal onto your work surface and roll out the dough. Don’t flip the dough; you only want cornmeal on the bottom.
- Put the peeled tomatoes with juices into a large bowl. Use your hands to crush the tomatoes, breaking them into small pieces. Don’t be afraid to get your hands dirty and don’t use a utensil. This is the secret to the perfect pizza.
- Shred the mozzarella using a thick-size grater.
- Sprinkle a thick layer of mozzarella onto the pizza crust. Fresh cheese is the base for this pizza.
- Spoon dollops of the tomatoes and sauce onto the pizza. You don’t want full coverage; spoon the sauce on the dough a few inches apart.
- Transfer your dough to the oven.
- Bake 2 to 3 minutes in the wood-fired pizza oven (the temperature should be around 750 to 800 degrees Fahrenheit).
- Remove the pizza from the oven. Drizzle with olive oil and add fresh basil.
- Allow the pizza to rest for 5 minutes before cutting and serving.